My tattoo was done in seven sessions with about 13 total hours of tattooing. The first was in July 2015 and the rest were scheduled between mid-September and late November of 2015 to allow about two weeks between each for healing. The times below are rough estimates for the different areas of work.
- Lotus outline – 1 hour
- Front hair outline – 3 hours
- Front hair shading – 2 hours
- Back outline part one – 3 hours
- Back outline part two – 2 hours
- Back shading (including blue on lotus) – 1 1/2 hours
- Front touchups – 1/2 hour
Setup and Planning
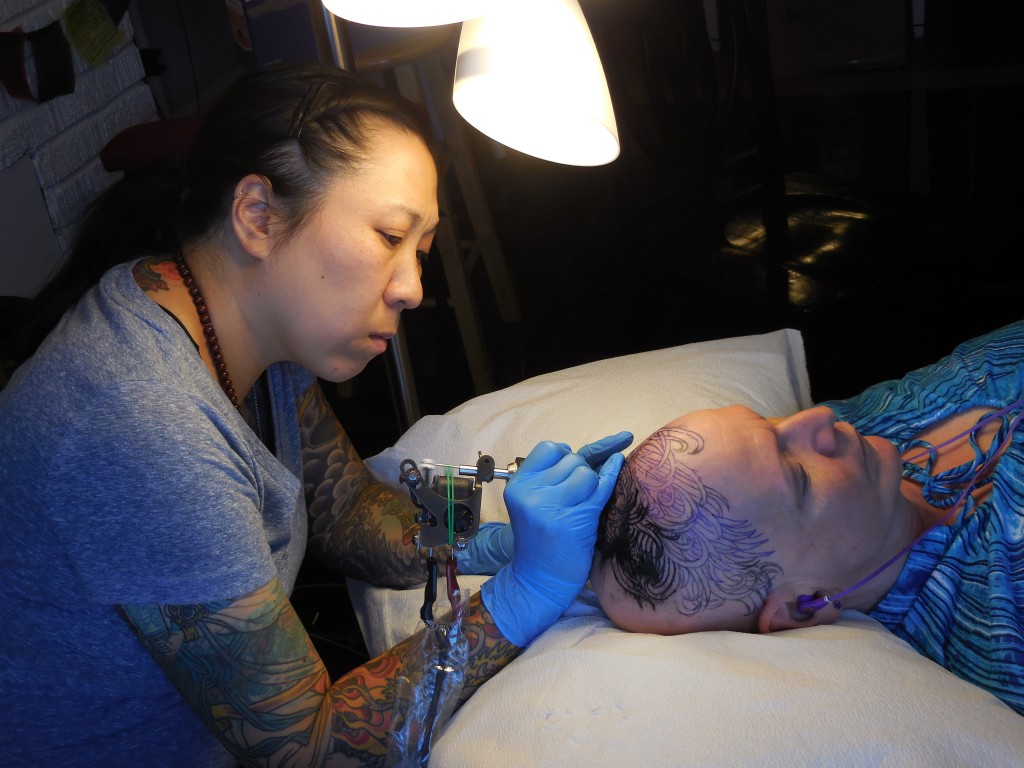
At the beginning of each session it took about 15 minutes or so to get the equipment and table set up. We also spent time going over the drawings I had sent and the stencils that Amy had created. The next step was to get the proper placement of the stencil. In the photo above the purple part is the stencil – just like the old mimeograph pages from junior high. In some cases she would make it larger or smaller to improve the fit. She would transfer the stencil to my head and then I could look at it in the mirror or on a photo on my phone. If needed, the entire thing was wiped off and we’d start over with a new stencil. Amy would sometimes tweak the outline by hand. We would then do the same cross-check in the mirror or photo before starting that part of the tattoo. Sometimes this preparation phase would take close to an hour. That’s important if you are trying to time your painkiller medication.
Tattooing
As far as the actual tattooing went, my contribution was to lie still for long stretches of time. See the “Did It Hurt?” page for my tips on making that as comfortable as possible. That said, it was still up to me to let Amy know when I needed a break. She had suggested I bring a fruit smoothie with me to recharge every so often. It felt good to get up and stretch every 30 to 45 minutes.
Healing
For the healing process and tattoo aftercare follow the instructions from your tattoo artist. I was told to buy a few items that were all available at the local grocery store .. in other words, nothing fancy or expensive. The main thing I can add to their words is don’t pick at your tattoo while it’s healing. That can be really tempting. Don’t do it! If it’s scratchy and peeling then put on more of the cream or lotion you were told to use. And don’t overdo the cream/lotion either.
 Since I was wearing my wig most of the day during the week it was important to try to keep some air flow around the scalp even with my wig on. I used thin weatherproofing foam that is sticky on one side to keep the wig off my head by a little bit. It was enough to help with airflow but wasn’t noticeable.
Knowing What to Expect
Before I got my tattoo I had never seen anyone else get a tattoo; never seen an episode of Miami Ink. This meant it was all a bit mysterious to me. I realize now that I could have watched some youtube videos of tattooing to understand it a bit better. The screenshot of the video below looks kind of icky – don’t let that discourage you from watching — it’s informative and pretty cool.
